Description:
“This lab is about having the Arduino interact with the world using analog outputs! While we have been using LEDs to output from the Arduino in the past few labs (remember LED Reaction Game and Whack-A-MoLED?), we will now create some complex output from the Arduino in two contexts – visual and sound. In the first two parts of the lab, we will light up the RGB LED in different colors. In the latter two parts, we will create interesting sounds using a piezo buzzer. Finally, in the Extra Volt, you will get the chance to combine the two outputs to create your own audio-visualizer!”
Github link for code: https://github.com/jafo3802/Lab-5-Analog-Out
Materials:
- Arduino (Elegoo) Uno R3 Controller Board
- USB Cable
- USB Adapter (if you have a USB-C-only laptop)
- Breadboard Jumper Wire
- Resistors
- RGB LED
- Joystick Module
- Passive Buzzer
- Multimeter
Part 1: Wiring RGB LED
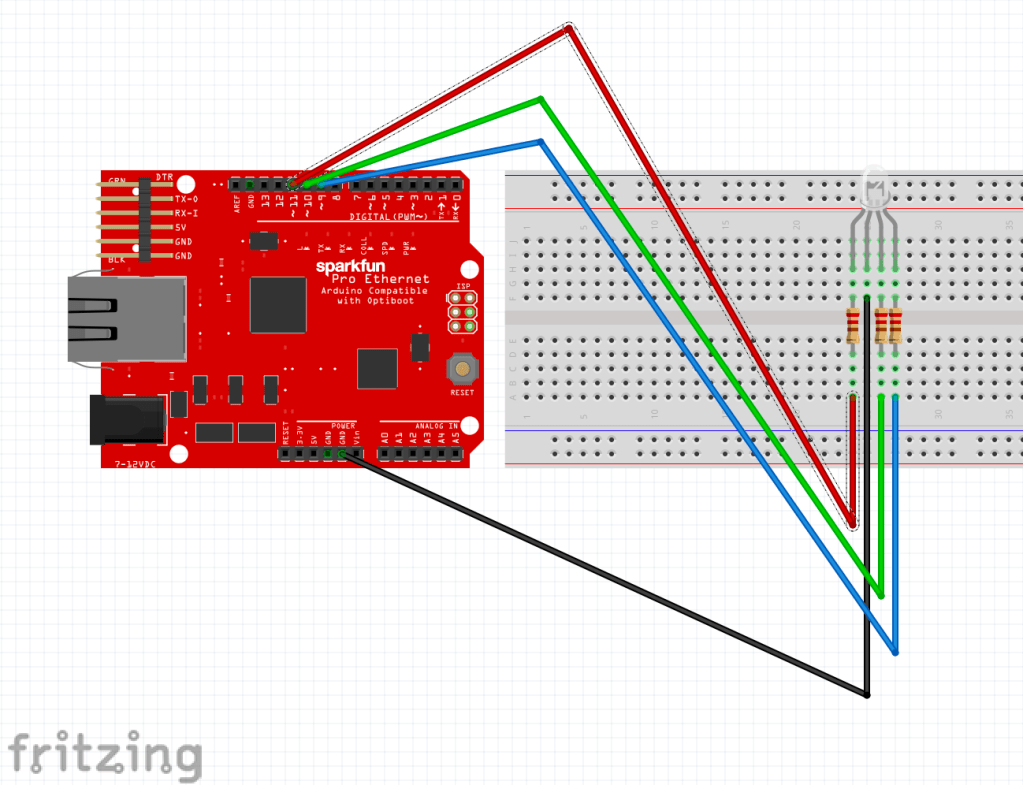
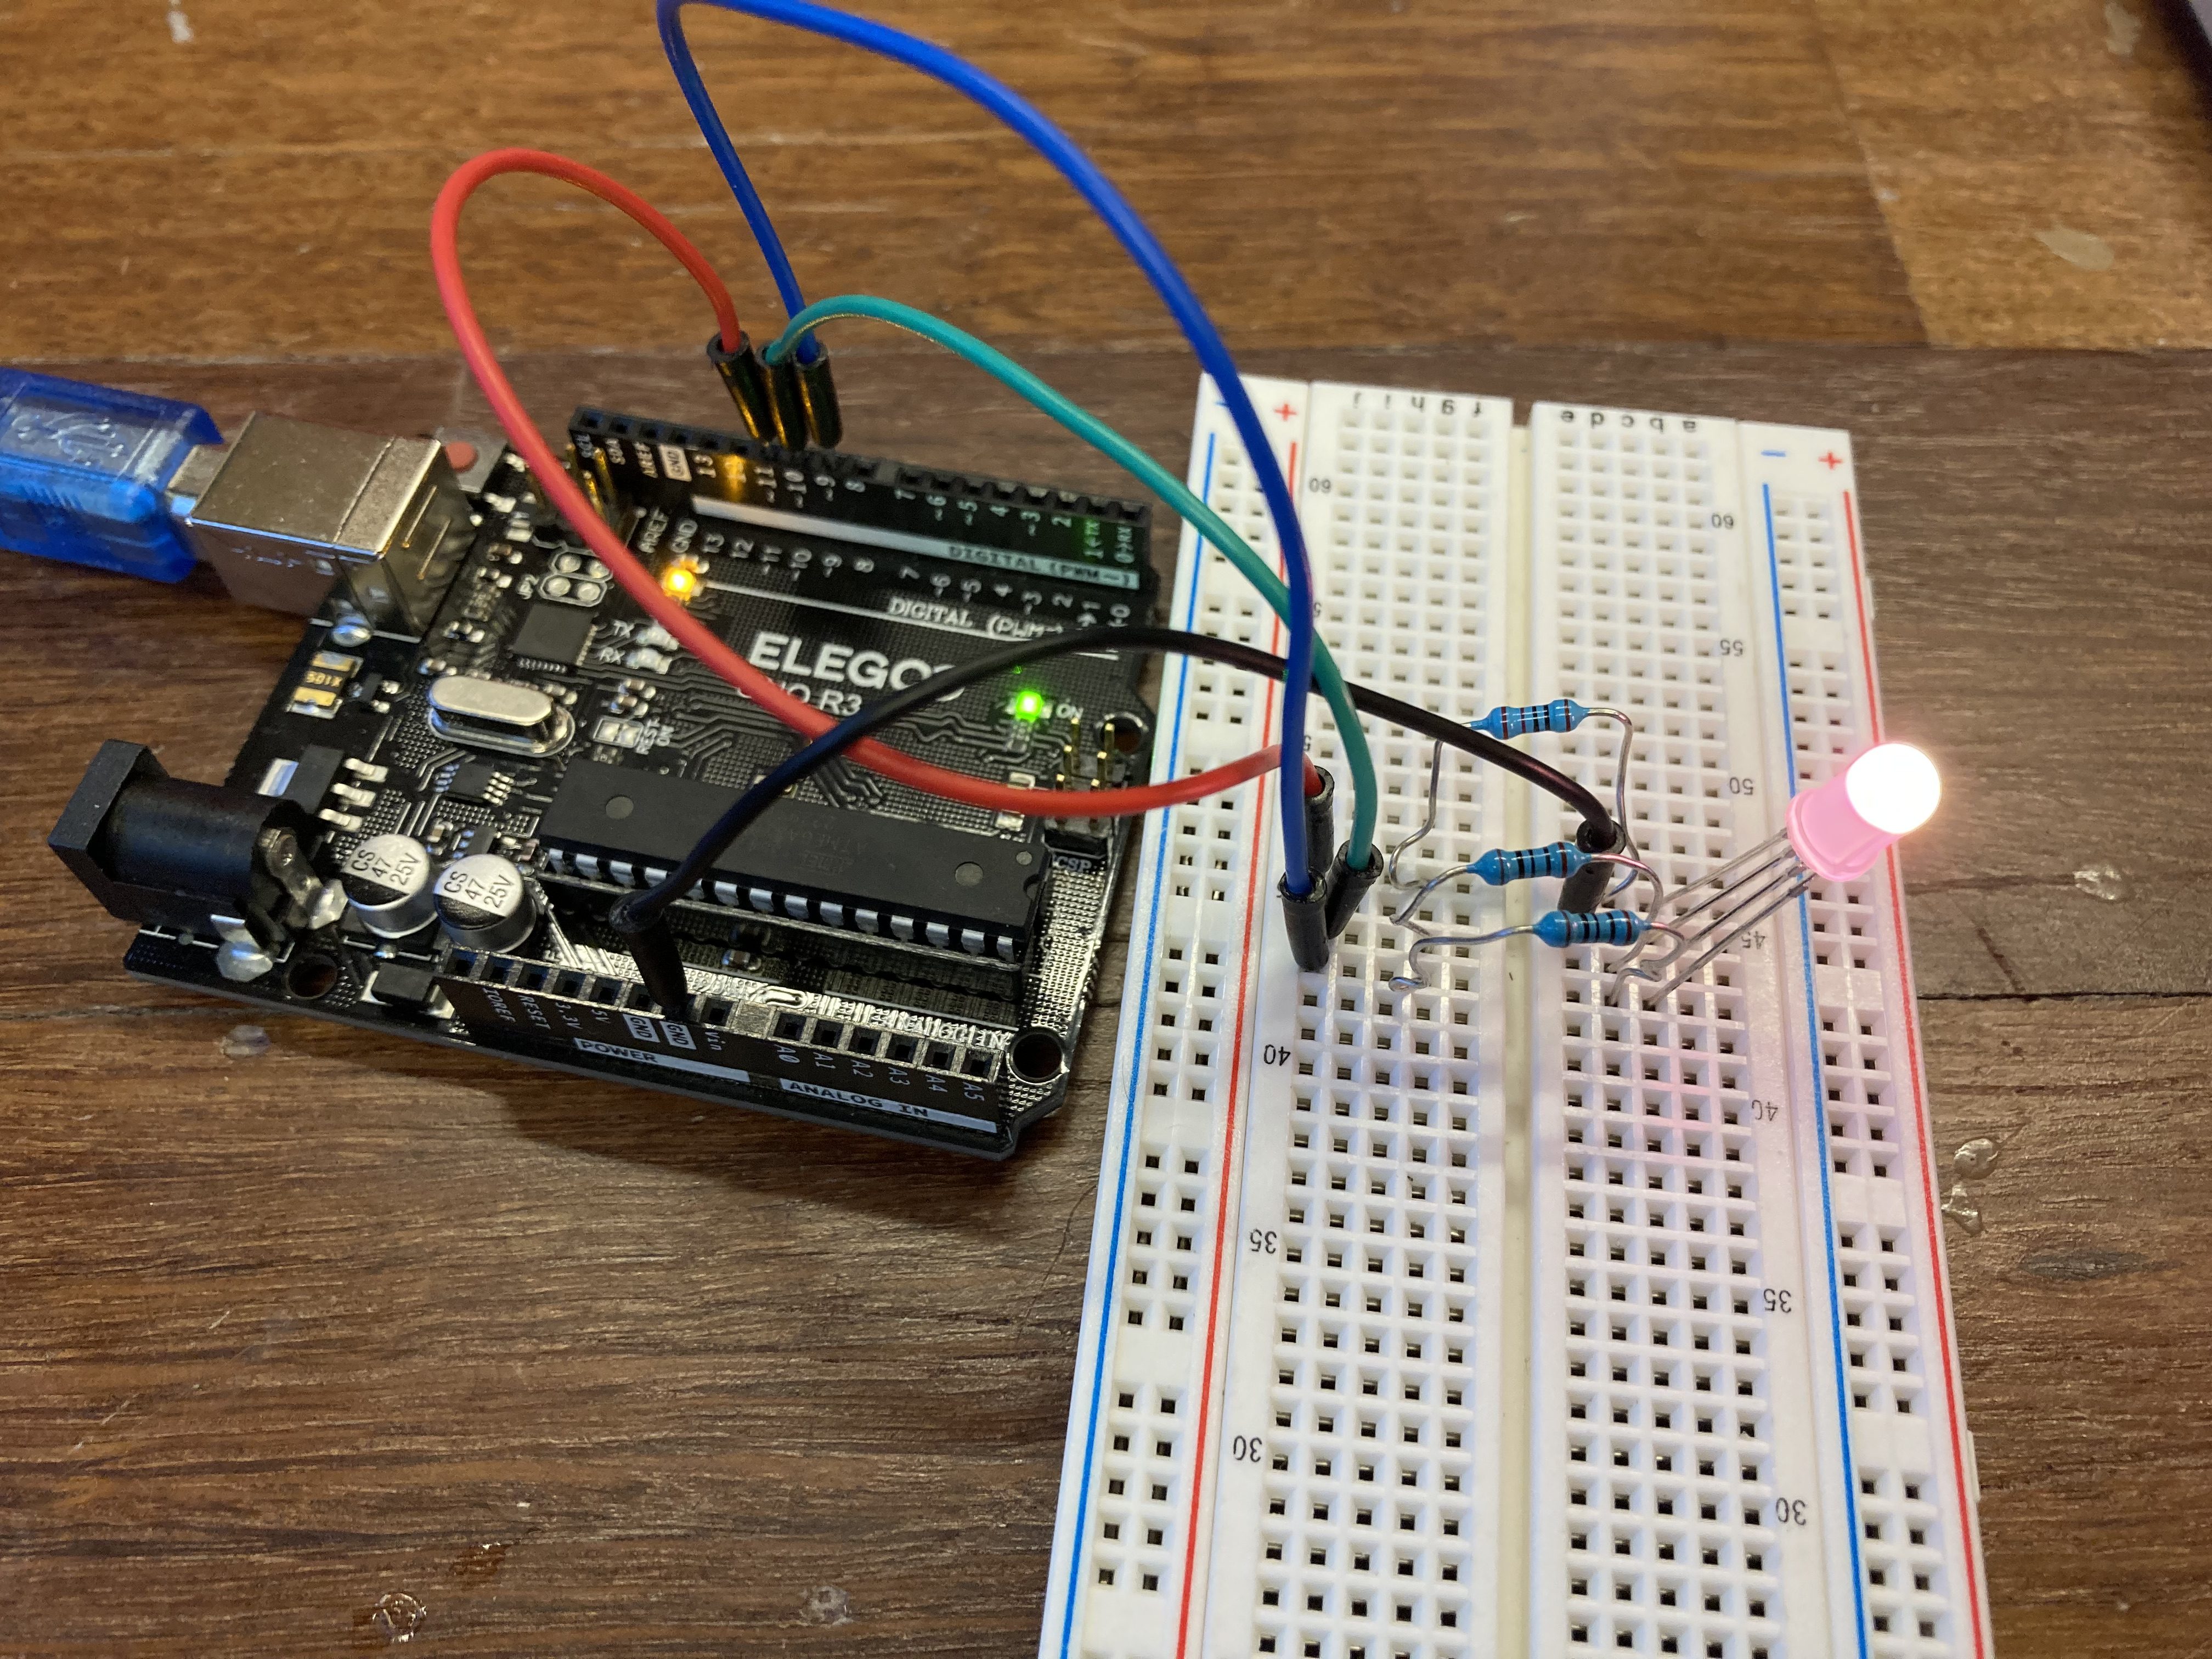
For the first part of this lab, I connected an RGB LED to the Arduino Microcontroller. With the RGB light, I had to connect each Red, Green, and Blue pin individually back to the Arduino. For the Red, I used a 100 Ohm resistor, and two 200 Ohm resistors for the Green and Blue since each connection had different amounts of voltage used to power the LED. These wires needed to be connected back to the Arduino with the pins marked with a ‘~’, indicating that they support Pulse-Width Modulation to control an analog output to the LED. A Fritzing schematic can be seen below along with the actual set up for the board.
Now that the board was set up, I lit up the LED in four different colors.

R: 255 B:255 G:255

R: 255 B:255 G:0
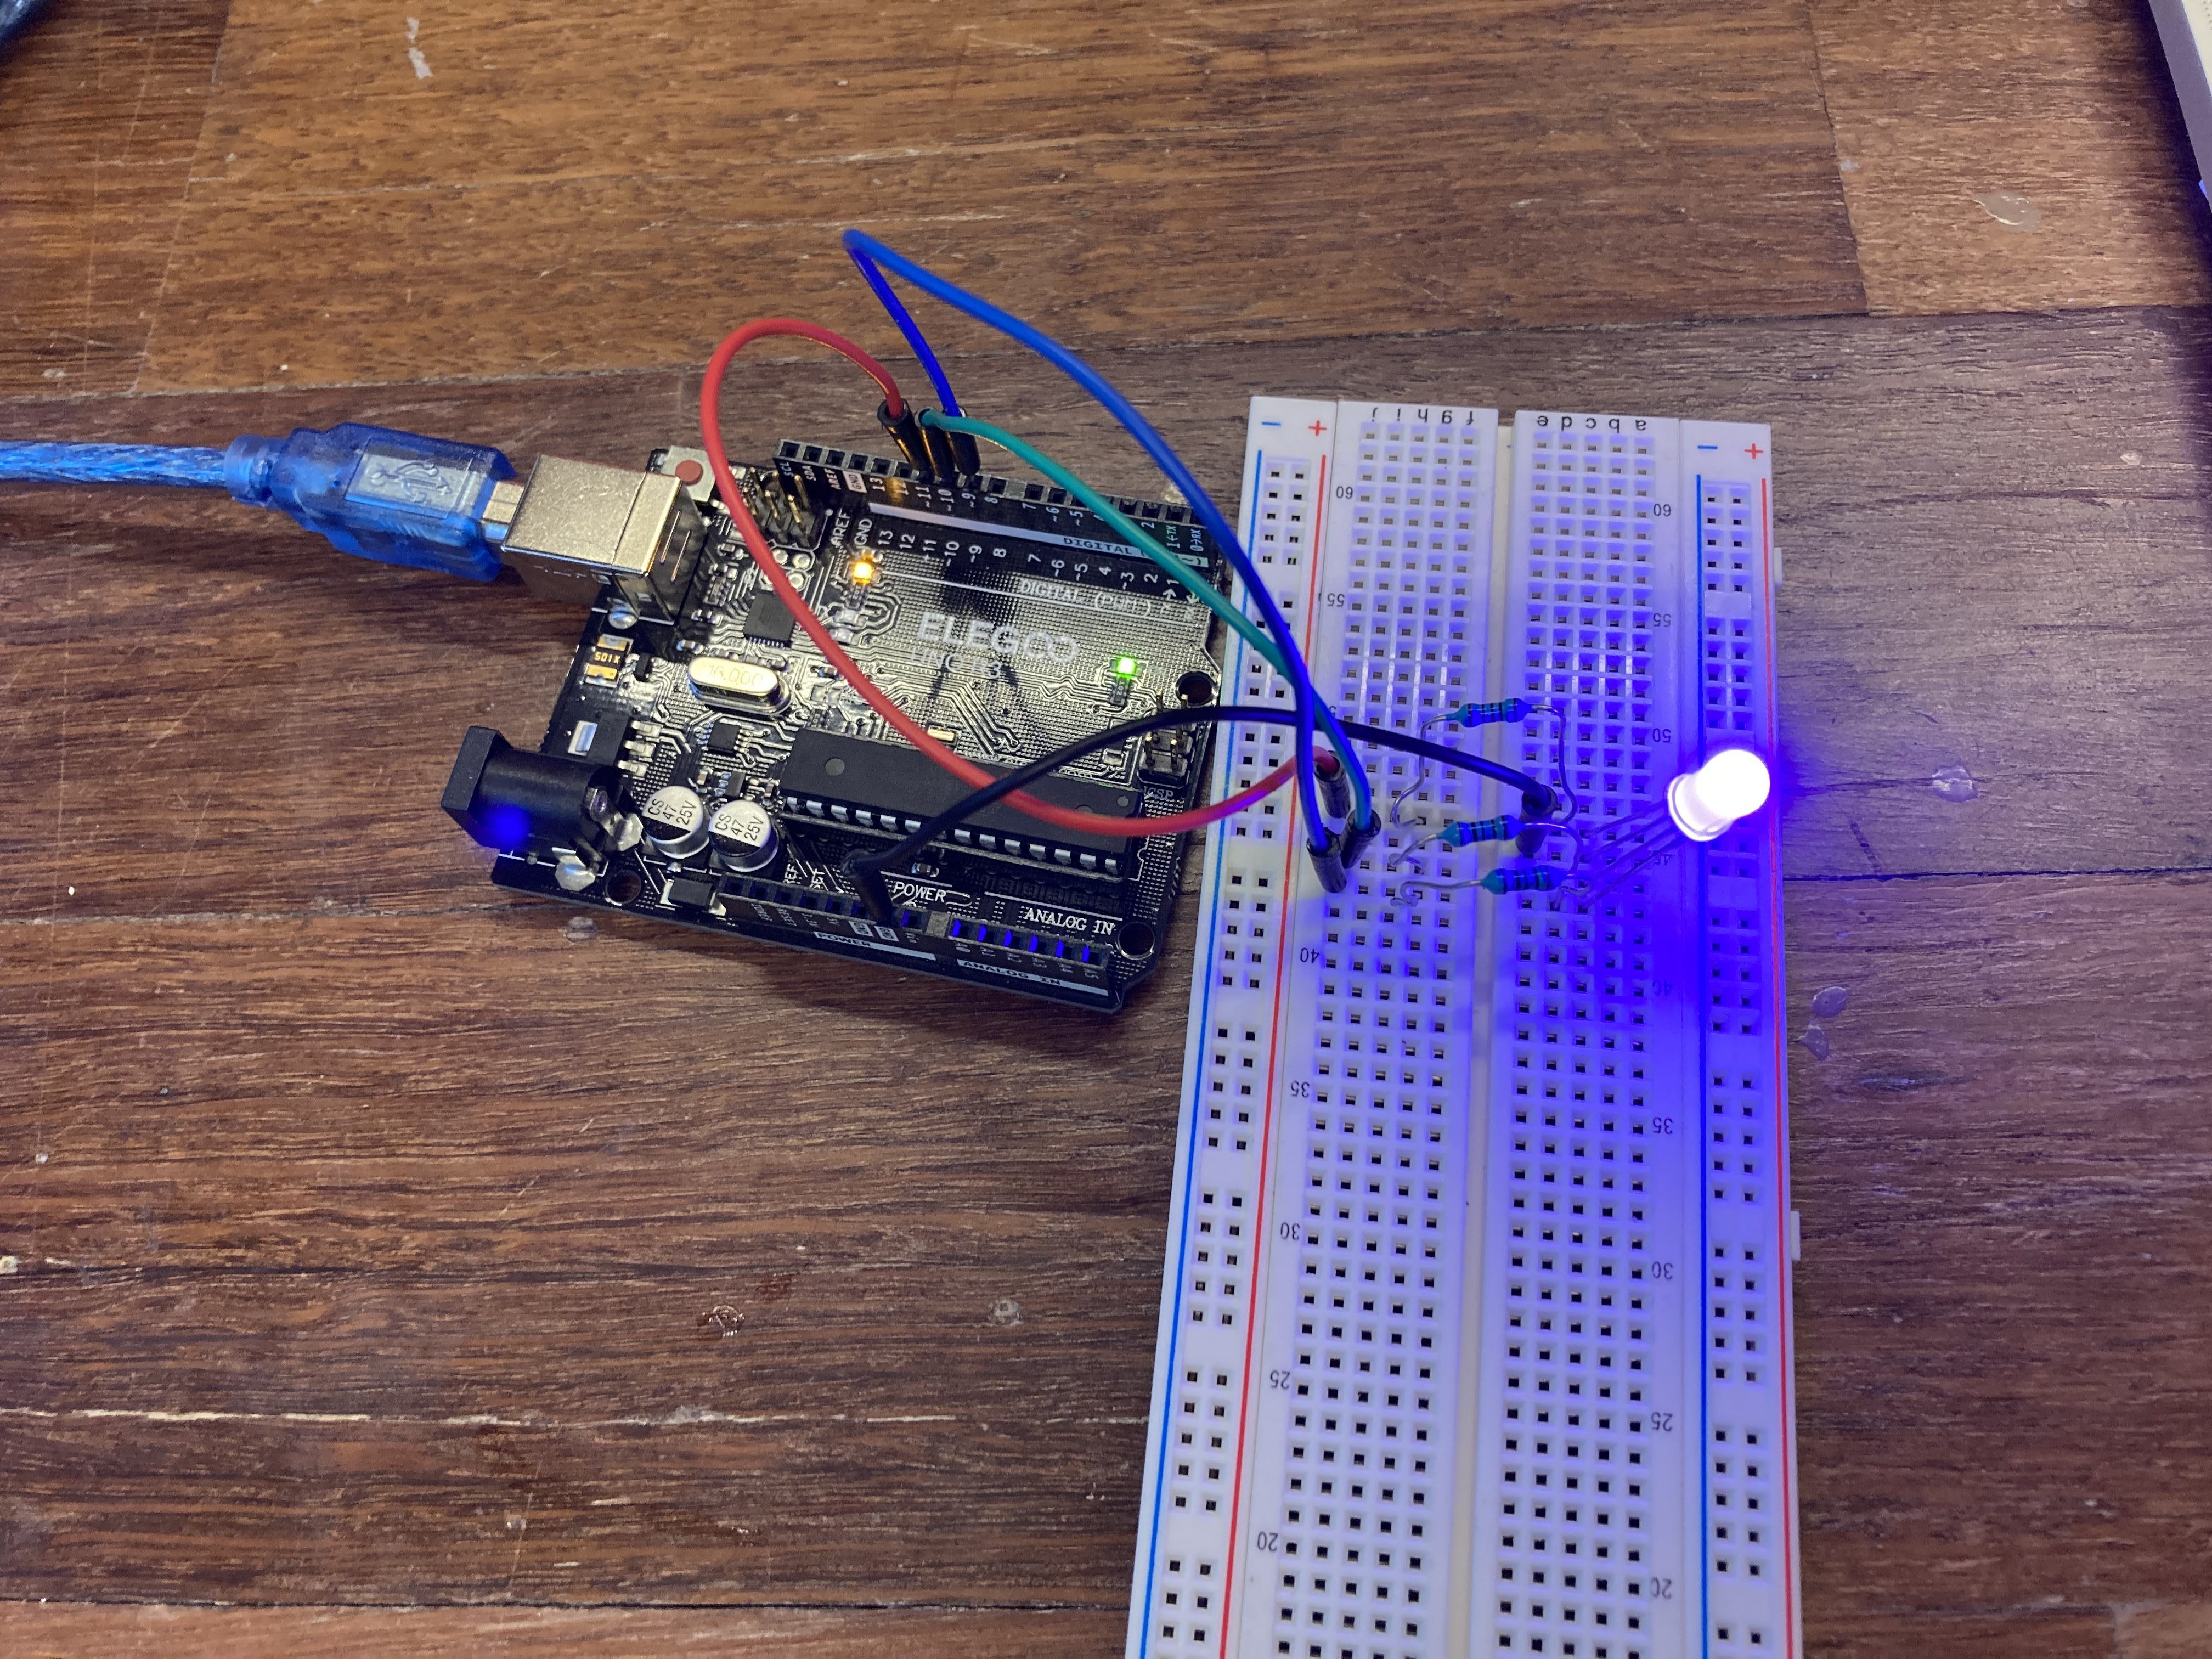
R: 0 B:0 G:255

R: 255 B:5 G:20
Below is the code that lights up the LED controlling the RGB inputs.
const int R_LED_PIN = 11;
const int G_LED_PIN = 10;
const int B_LED_PIN = 9;

void setup()
{
    pinMode(R_LED_PIN, OUTPUT);
    pinMode(G_LED_PIN, OUTPUT);
    pinMode(B_LED_PIN, OUTPUT);
}

void loop()
{
    analogWrite(R_LED_PIN, 255);
    analogWrite(G_LED_PIN, 20);
    analogWrite(B_LED_PIN, 5);

}
Part 2: Joystick and LED Color Changer
For part 2, I connected the joystick potentiometer to the LED so that the movement of the joystick would control the LED color output. The x and y inputs from the joystick would change the Red and Blue colors, respectively. The Green color would output a random number between 0-255 as the joystick moved as well.
const int R_LED_PIN = 11;
const int G_LED_PIN = 10;
const int B_LED_PIN = 9;

const int xPin = A0;
const int yPin = A1;

void setup()
{
  pinMode(R_LED_PIN, OUTPUT);
  pinMode(G_LED_PIN, OUTPUT);
  pinMode(B_LED_PIN, OUTPUT);
  pinMode(xPin, INPUT);
  pinMode(yPin, INPUT);
  randomSeed(3);
}

void loop()
{

  int x = analogRead(xPin);
  int y = analogRead(yPin);

  int R_Value = map(x, 0, 1023, 0, 255);
  int B_Value = map(y, 0, 1023, 0, 255);
  int G_Value = random(0,255);

  analogWrite(R_LED_PIN, R_Value);
  analogWrite(G_LED_PIN, G_Value);
  analogWrite(B_LED_PIN, B_Value);

}
Part 3: Musical Note Passive Buzzer
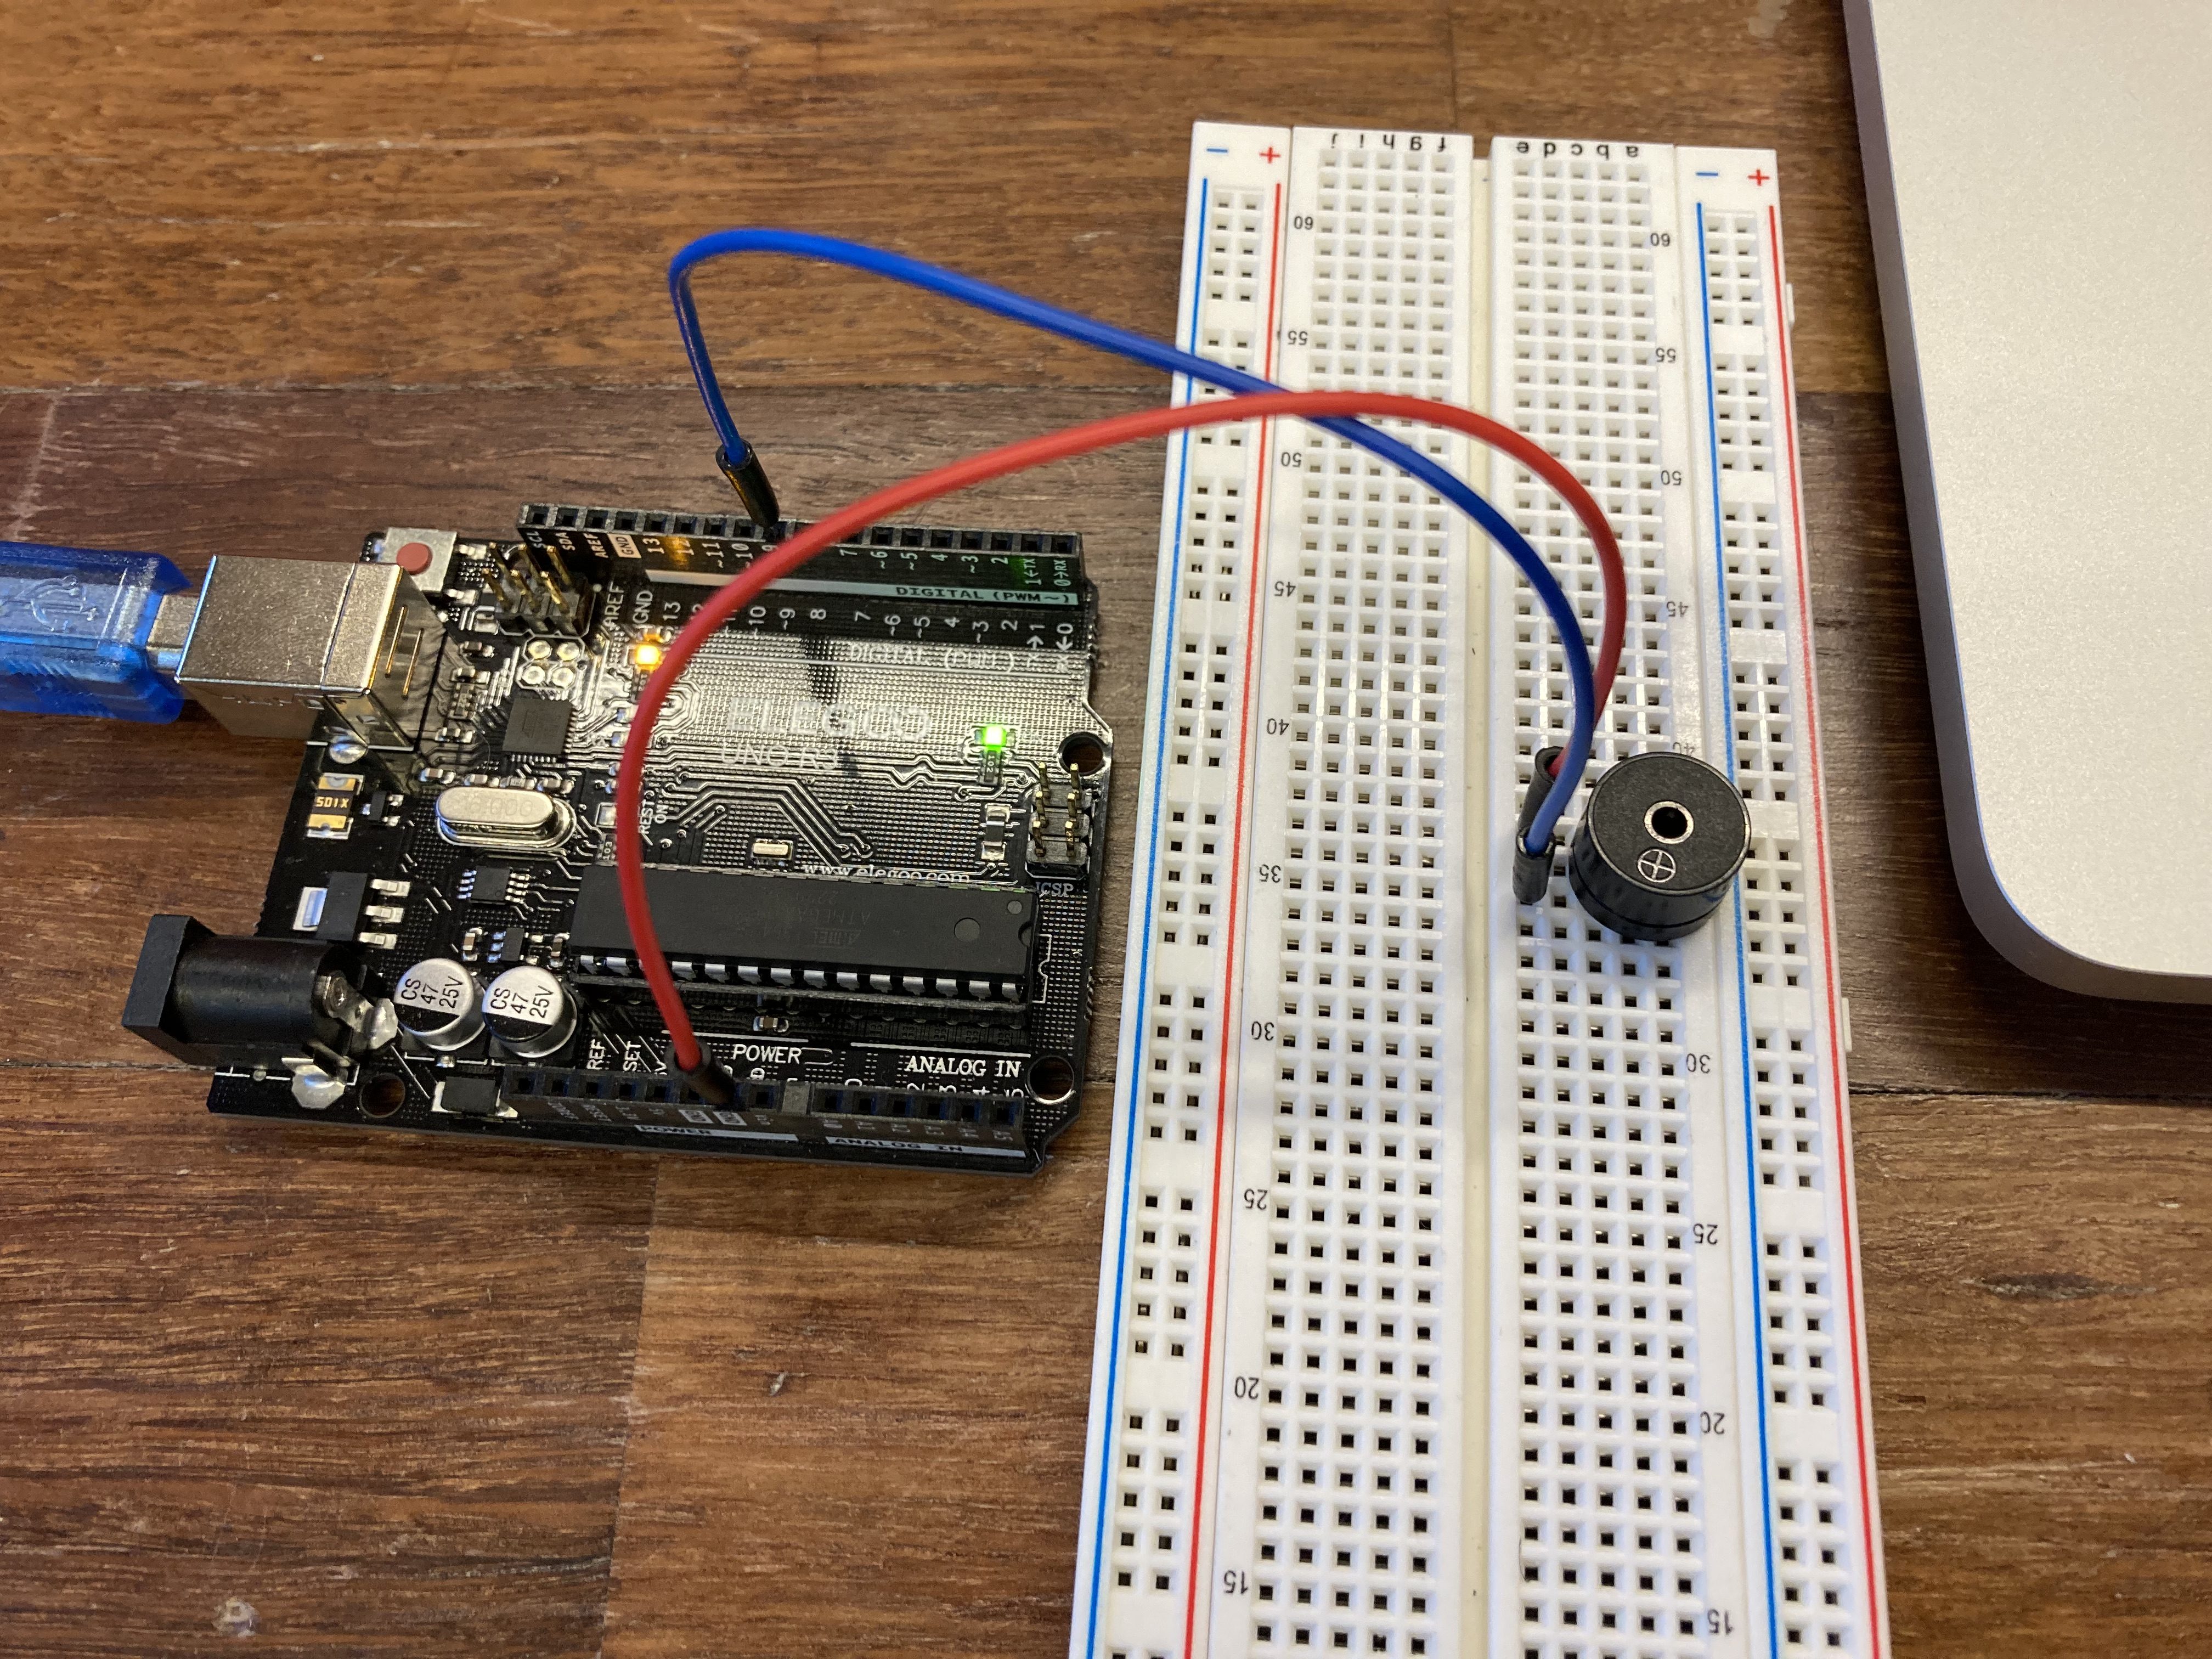
Next, I used the Passive Buzzer from the Arduino kit to get an audible analog output. The passive buzzer is a type of speaker that can be used to generate sounds of different frequencies. I connected the buzzer pin to input analog PWM signals so that I may change what frequency goes into the buzzer. A demonstration of the buzzer beeping for 1 second intervals at 440 Hz (A4 key).
To create the beeping noise, I started by setting the tone to beep at 440Hz for 1 second intervals
const int BUZZER_PIN = 9;
int frequency = 440;                     // Output frequency of 260 Hz

void setup()
{
    pinMode(BUZZER_PIN, OUTPUT);
}
// This code will play continuous sound of frequency 260Hz (without stopping)
// THIS IS A DUMMY CODE (Make changes to make the buzzer beep at 1s intervals
void loop()
{
    tone(BUZZER_PIN, frequency);         // Produce a sound of frequency 260HZ
    delay(1000);                        // Delay for 1s while the beep plays - IMPORTANT!
    noTone(BUZZER_PIN);
    delay(1000);              // Stops the tone already being played
}
In order to change the frequency, I used a .h file included in the main Arduino code that contained the music notes linked with the appropriate frequency value. To use the ‘pitches.h’ file with the Arduino.ino file, both files need to be saved in the same folder and included in the .ino file.
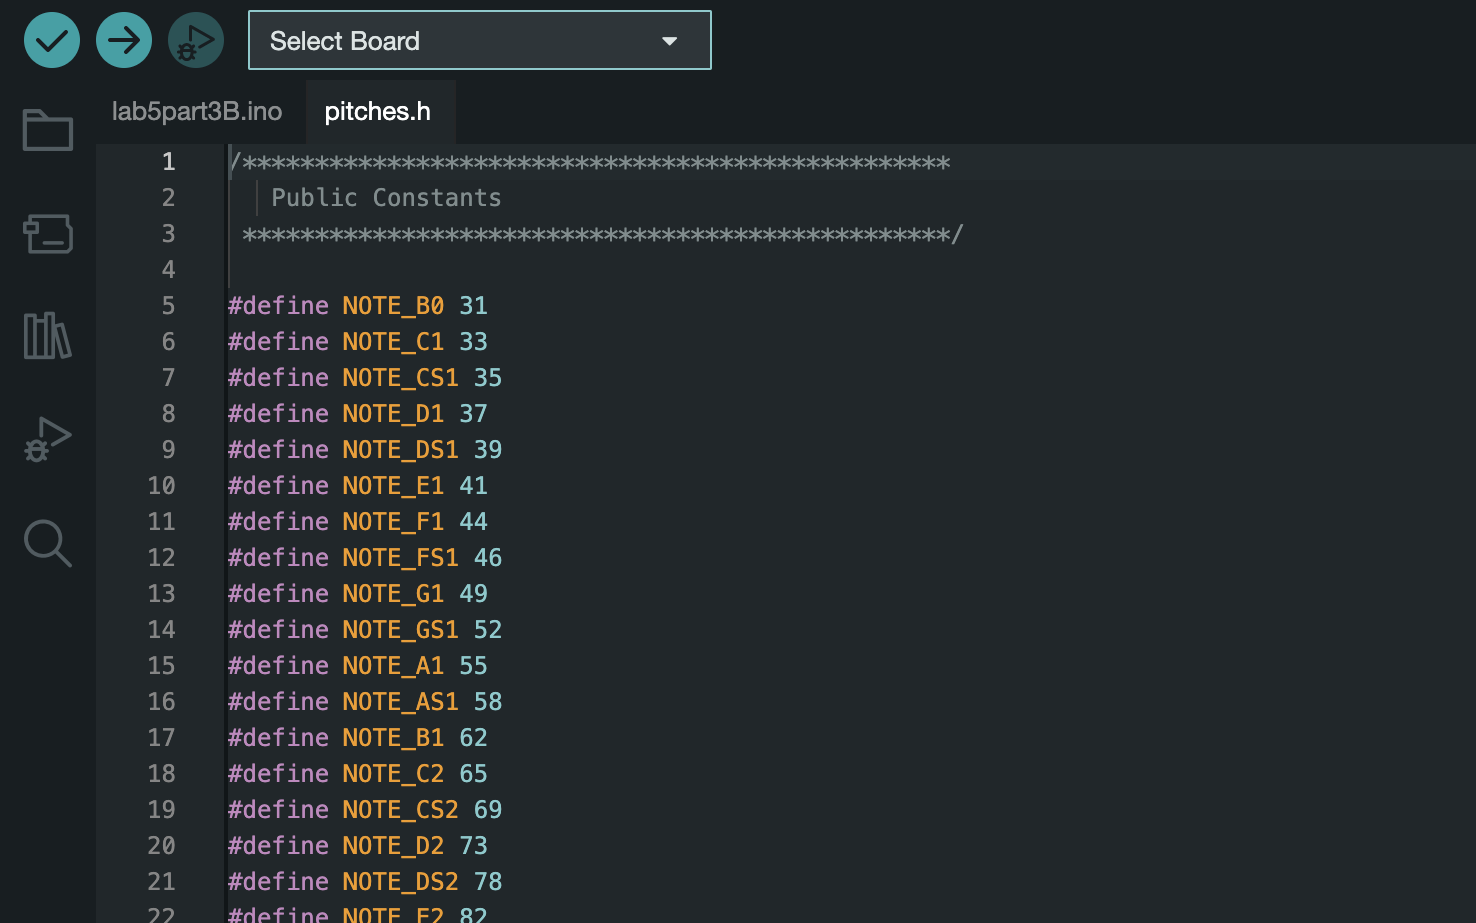
Now that the pitches.h file is included, I changed the frequency of the buzzer to output “NOTE_A4” rather than just 440Hz.
#include "pitches.h"

const int BUZZER_PIN = 9;
int frequency = NOTE_A4;                     // Output frequency of 260 Hz

void setup()
{
    pinMode(BUZZER_PIN, OUTPUT);
}
// This code will play continuous sound of frequency 260Hz (without stopping)
// THIS IS A DUMMY CODE (Make changes to make the buzzer beep at 1s intervals
void loop()
{
    tone(BUZZER_PIN, frequency);         // Produce a sound of frequency 260HZ
    delay(1000);                        // Delay for 1s while the beep plays - IMPORTANT!
    noTone(BUZZER_PIN);
    delay(1000);              // Stops the tone already being played
}
Part 4:
For the final part, I created a melody using the different notes assigned in the pitches.h file. As a test, I first created the melody of the Imperial March from Star Wars.
Now that I knew how to create a melody, I made my own. I attempted to recreate the “Happy Birthday” song but could know figure out the correct spacing between notes. Although each note is correct, the tempo at which it plays is off, but created an interesting remix that I decided to use for my melody. The notes can be seen below in the table.
| Note | Duration |
| G4 | Half |
| G4 | Half |
| A4 | Eighth |
| G4 | Eighth |
| C5 | Eighth |
| B4 | Sixteenth |
| G4 | Half |
| G4 | Half |
| A4 | Eighth |
| G4 | Eighth |
| D5 | Sixteenth |
| C5 | Half |
| G4 | Half |
| G4 | Half |
| G5 | Eighth |
| E5 | Eighth |
| C5 | Eighth |
| B4 | Eighth |
| A4 | Sixteenth |
| F4 | Half |
| F5 | Half |
| E5 | Eighth |
| C5 | Eighth |
| D5 | Eighth |
| C5 | Sixteenth |
#include "pitches.h"

const int full_note = 2000;    // Full note duration in ms

const int half_note = full_note / 2;
const int quarter_note = full_note / 4;
const int eighth_note  = full_note / 8;    // And so on for 1/2, 1/16 ...
const int sixteenth_note = full_note / 16;

const int dotted_quarter_note = quarter_note * 1.5;
const int dotted_eighth_note  = eighth_note * 1.5;    // And so on for 1/2, 1/16 ..

const int BUZZER_PIN = 9;


void setup() {
  // put your setup code here, to run once:
  pinMode(BUZZER_PIN, OUTPUT);

}

void loop() {
  // put your main code here, to run repeatedly:
  tone(BUZZER_PIN, NOTE_G4, half_note);
  delay(half_note * 1.2);
  noTone(BUZZER_PIN);

  tone(BUZZER_PIN, NOTE_G4, half_note);
  delay(half_note * 1.2);
  noTone(BUZZER_PIN);

  tone(BUZZER_PIN, NOTE_A4, eighth_note);
  delay(eighth_note * 1.2);
  noTone(BUZZER_PIN);

  tone(BUZZER_PIN, NOTE_G4, eighth_note);
  delay(eighth_note * 1.2);
  noTone(BUZZER_PIN);

  tone(BUZZER_PIN, NOTE_C5, eighth_note);
  delay(eighth_note * 1.2);
  noTone(BUZZER_PIN);

  tone(BUZZER_PIN, NOTE_B4, sixteenth_note);
  delay(sixteenth_note * 1.2);
  noTone(BUZZER_PIN);

  tone(BUZZER_PIN, NOTE_G4, half_note);
  delay(half_note * 1.2);
  noTone(BUZZER_PIN);

  tone(BUZZER_PIN, NOTE_G4, half_note);
  delay(half_note * 1.2);
  noTone(BUZZER_PIN);

  tone(BUZZER_PIN, NOTE_A4, eighth_note);
  delay(eighth_note * 1.2);
  noTone(BUZZER_PIN);

  tone(BUZZER_PIN, NOTE_G4, eighth_note);
  delay(eighth_note * 1.2);
  noTone(BUZZER_PIN);

  tone(BUZZER_PIN, NOTE_D5, sixteenth_note);
  delay(sixteenth_note * 1.2);
  noTone(BUZZER_PIN);

  tone(BUZZER_PIN, NOTE_C5, half_note);
  delay(half_note * 1.2);
  noTone(BUZZER_PIN);

  tone(BUZZER_PIN, NOTE_G4, half_note);
  delay(half_note * 1.2);
  noTone(BUZZER_PIN);

  tone(BUZZER_PIN, NOTE_G4, half_note);
  delay(half_note * 1.2);
  noTone(BUZZER_PIN);

  tone(BUZZER_PIN, NOTE_G5, eighth_note);
  delay(eighth_note * 1.2);
  noTone(BUZZER_PIN);

  tone(BUZZER_PIN, NOTE_E5, eighth_note);
  delay(eighth_note * 1.2);
  noTone(BUZZER_PIN);

  tone(BUZZER_PIN, NOTE_C5, eighth_note);
  delay(eighth_note * 1.2);
  noTone(BUZZER_PIN);

  tone(BUZZER_PIN, NOTE_B4, eighth_note);
  delay(eighth_note * 1.2);
  noTone(BUZZER_PIN);

  tone(BUZZER_PIN, NOTE_A4, sixteenth_note);
  delay(sixteenth_note * 1.2);
  noTone(BUZZER_PIN);

  tone(BUZZER_PIN, NOTE_F4, half_note);
  delay(half_note * 1.2);
  noTone(BUZZER_PIN);

  tone(BUZZER_PIN, NOTE_F5, half_note);
  delay(half_note * 1.2);
  noTone(BUZZER_PIN);

  tone(BUZZER_PIN, NOTE_E5, eighth_note);
  delay(eighth_note * 1.2);
  noTone(BUZZER_PIN);

  tone(BUZZER_PIN, NOTE_C5, eighth_note);
  delay(eighth_note * 1.2);
  noTone(BUZZER_PIN);

  tone(BUZZER_PIN, NOTE_D5, eighth_note);
  delay(eighth_note * 1.2);
  noTone(BUZZER_PIN);

  tone(BUZZER_PIN, NOTE_C5, sixteenth_note);
  delay(sixteenth_note * 1.2);
  noTone(BUZZER_PIN);
}
Conclusion:
This lab was fairly easy for creating analog output. I enjoyed using the LED more than using the buzzer since I am not very musically talented with creating melodies using music notes. Using the Joystick with the RGB LED was pretty interesting to me. I was able to use my understanding from the previous Lab 4 that introduced me to using the map() function with the the Joystick inputs.
